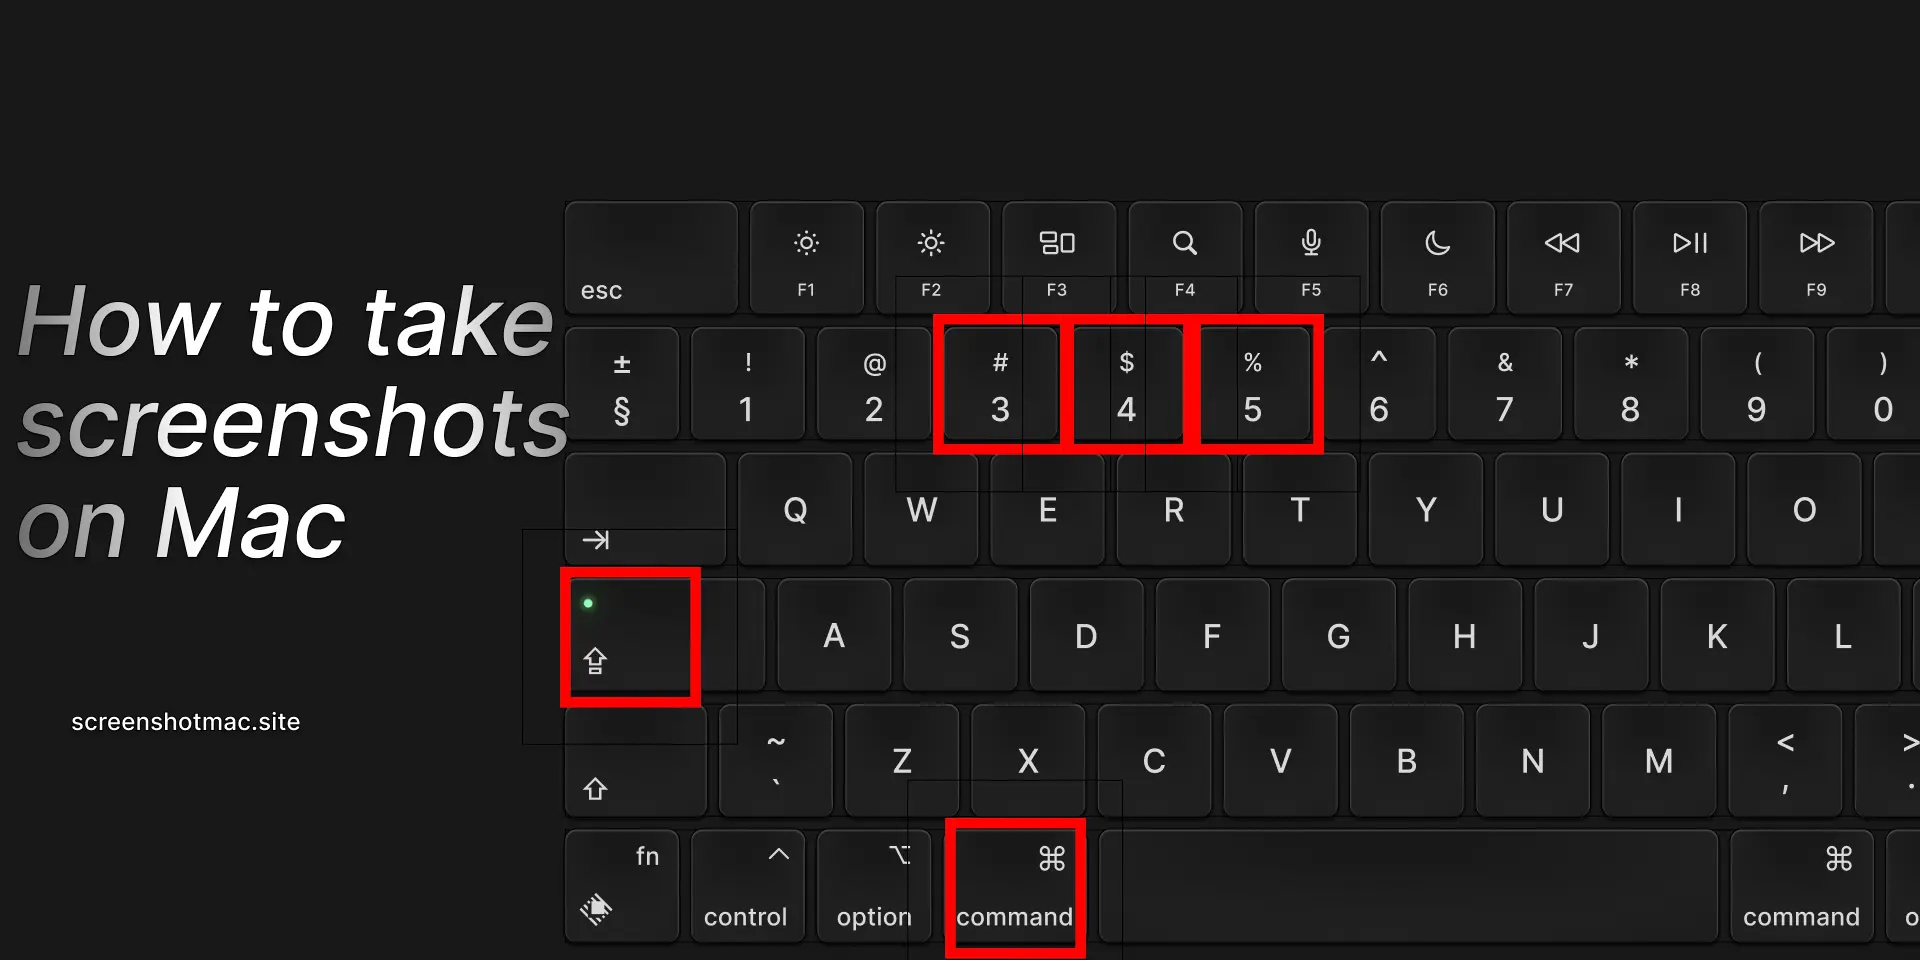
To take screenshots on a Mac, press Command (⌘) + Shift + 3 to capture the entire screen or Command (⌘) + Shift + 4 to select a specific area. For more options, use Command (⌘) + Shift + 5, which opens the Screenshot toolbar. From there, you can capture windows, record the screen, and choose where to save your screenshots for quick access.
If you’re wondering how to take a screenshot on a Mac, you’re in the right place. Learning how to take a screenshot on a Mac is one of the most useful skills for anyone using an Apple device — whether it’s a MacBook, an iMac, or a Mac mini. With just a few clicks, you can capture your screen, create tutorials, or even start screen recordings easily and quickly.
From sharing an image during an online meeting to creating a guide or saving a web page from the World Wide Web, knowing how to take screenshots on a Mac will help you become more productive and precise. In this complete guide, you’ll discover all the methods to capture screenshots on macOS, including keyboard shortcuts, how to use the Screenshot app, setting a timer, and managing file saving.
Why learning to take screenshots on Mac is important

1. Screenshot of the entire screen
The quickest way to understand how to take a screenshot on a Mac is to capture everything that appears on your Apple computer’s desktop. To do this, press Command (⌘) + Shift + 3. Your Mac will automatically save the screenshot to the desktop in PNG format. In short, pressing Command + Shift + 3 captures the entire screen and stores the image as a PNG file for easy access.
2. Screenshot of a portion of the screen
If you want to take a screenshot on your Mac of only a specific part of the screen, this is the ideal method. Press Command (⌘) + Shift + 4 on your keyboard. After pressing the keys, the cursor will turn into a crosshair. Click and drag to select the desired area, then release the mouse or trackpad to capture it. The image will be automatically saved as a PNG file on your desktop.
3. Screenshot of a specific window
If you want to capture only a specific window on your Mac without including the background, use this method. Press Command (⌘) + Shift + 4, then hit the spacebar. The cursor will turn into a camera icon. Click on the window you want to capture, and your Mac will save the screenshot automatically to the desktop as a PNG file.
4. Screenshot with preview in the corner
5. Screenshot using the Screenshot app
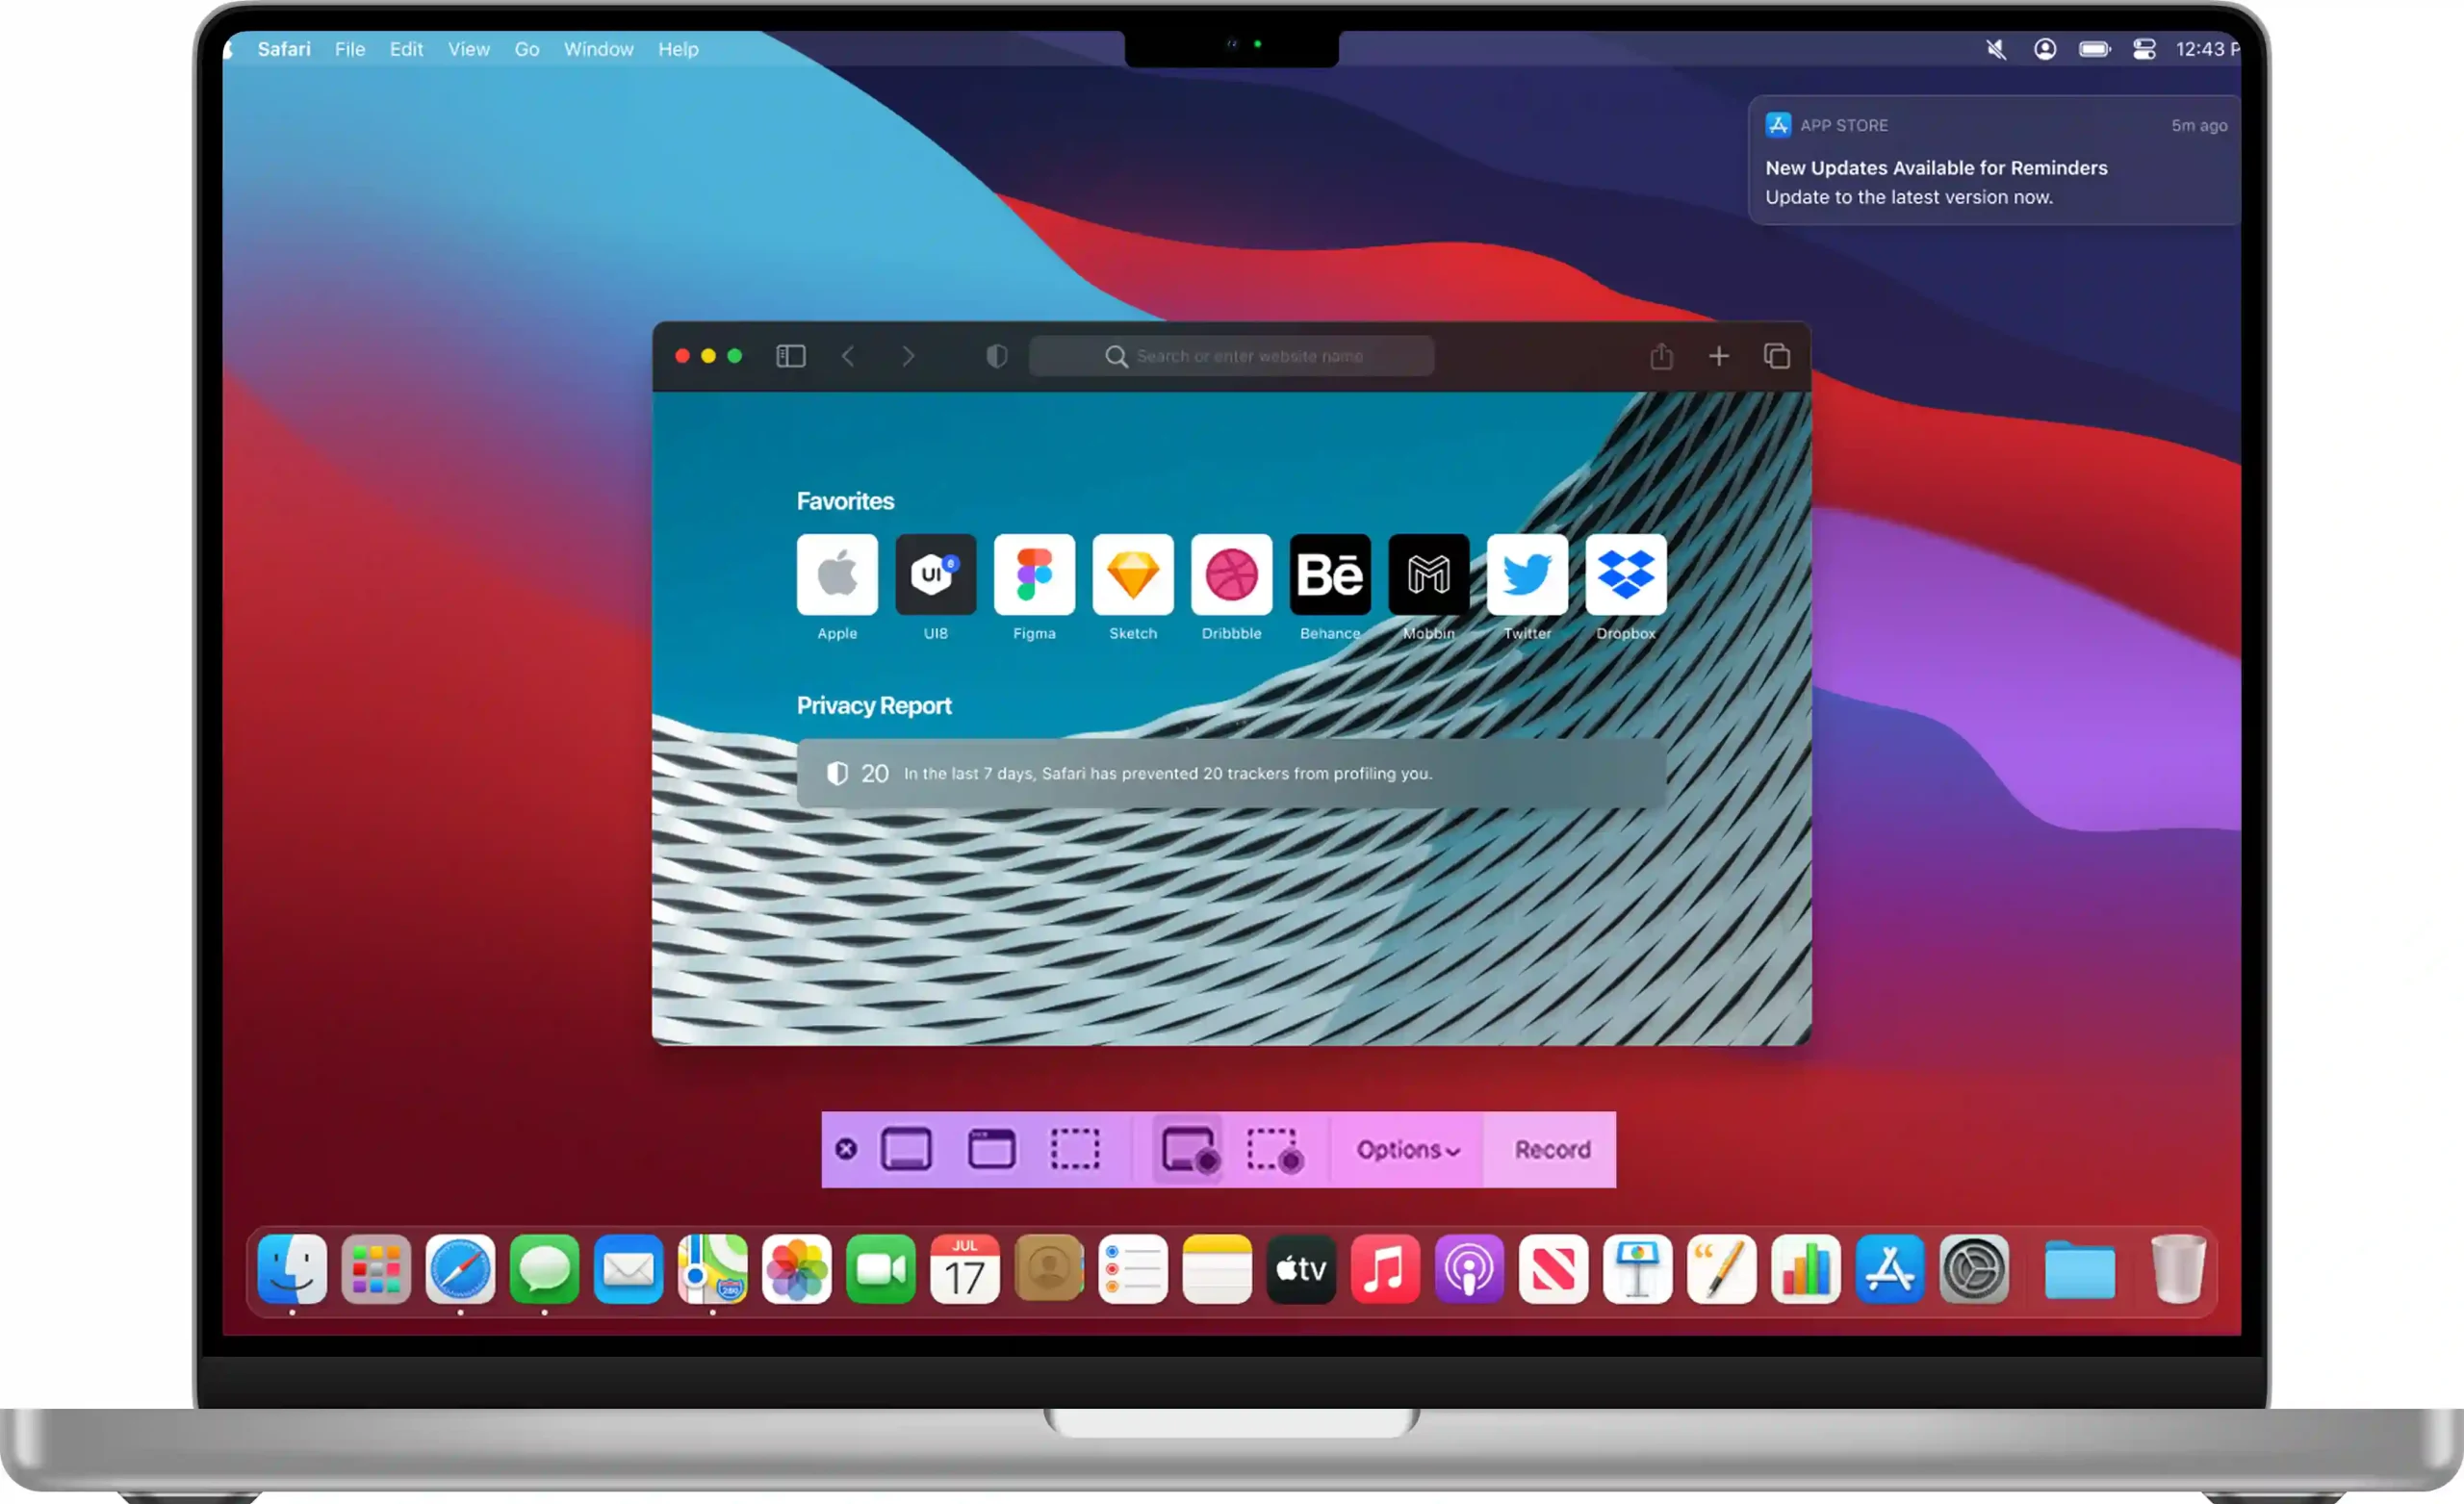
macOS includes a built-in app called Screenshot (or Istantanea dello Schermo), one of the most useful tools for quickly and easily learning how to take screenshots on a Mac. To open it, press Command (⌘) + Shift + 5. This app lets you capture the entire screen, record a selected area, capture a specific window, set a timer (5 or 10 seconds), choose a custom save location, and show or hide the mouse pointer.
6. Screenshot with timer
If you want to capture a menu or an action that takes time, open the Screenshot app by pressing Command (⌘) + Shift + 5. Then select the Timer option (5 or 10 seconds), prepare your screen or the specific area you want to capture, and wait for the screenshot to be taken automatically.
7. Screenshot on Mac without a keyboard
If you use a desktop Mac or your keyboard isn’t working, open Launchpad > Other > Screenshot. With just a few clicks, you can take screenshots and record your screen. To take a screenshot on a Mac without a keyboard, simply open the Screenshot app and use the visual on-screen controls.
Table of main keyboard shortcuts for screenshots on Mac
| Action | Shortcut | Result |
| Entire screen | Command + Shift + 3 | Screenshot of the desktop |
| Selected portion | Command + Shift + 4 | Capture the selection |
| Specific window | Command + Shift + 4 + Spacebar | Only the window |
| App Screenshot | Command + Shift + 5 | Advanced menu |
| Copy to clipboard | Add Control key to the combination | Screenshot copied, not saved |
Where are screenshots saved on Mac
By default, screenshots on a Mac are saved to the Desktop, making them easy to find immediately after capture. However, you can customize the save location through the Screenshot app’s options, which is especially useful if you take screenshots frequently and want to keep your Desktop organized. Screenshots can also be shared directly via Mail, Messages, or Preview, or saved to Dropbox for cloud access. Additionally, you can manage and organize them later in Finder, rename files, or move them to specific project folders. Using these options ensures that your screenshots are both accessible and well-organized, making it easier to use them in presentations, documents, tutorials, or social media posts without wasting time searching for files.
Edit Screenshots on Mac
After taking a screenshot on your Mac, you have several options to edit and enhance it. The simplest method is to open the screenshot in Preview, which allows you to crop the image, add text annotations, highlight areas, draw shapes, or even sign documents. This is useful for marking up documents, creating guides, or sharing visual instructions.
Alternatively, you can manage screenshots using the Photos app or other compatible applications, where you can adjust colors, apply filters, resize images, or organize them into albums for easier access. macOS also provides a quick editing feature: immediately after taking a screenshot, a thumbnail appears in the bottom-right corner. Clicking this thumbnail opens a fast-edit window where you can crop, annotate, rotate, or share the screenshot without opening another app.
These editing tools make it easy to prepare screenshots for work, study, tutorials, presentations, or social media, giving you control over the appearance and clarity of your images while saving time.
Third-party applications to Take Screenshots on Mac
In addition to the built-in screenshot tools on macOS, several third-party applications can enhance your workflow and provide advanced features. CleanShot X is a professional tool for capturing screenshots, annotating images, and organizing them efficiently. It also offers cloud integration, making it easy to store, share, and access screenshots from anywhere.
Snagit is ideal for creating tutorials, guides, or instructional content. It allows precise screenshots and supports high-quality screen recordings, perfect for professionals and educators documenting workflows or software demonstrations.
For simplicity and speed, Lightshot is a lightweight, intuitive tool enabling quick captures, easy annotations, and instant sharing — great for daily use or social media posts.
These third-party tools expand macOS screenshot capabilities, offering flexibility, efficiency, and customization.
Practical tips to Take Screenshots on Mac
Use Control + shortcut combinations to copy screenshots to the clipboard instead of saving them directly to the Desktop, helping prevent clutter. Organize your screenshots by creating a dedicated Mac Screenshot folder to keep all your captures in one place. You can also use the timer feature to capture menus or other elements that appear only briefly on the screen, ensuring you don’t miss important details.
Additionally, in the Screenshot app’s options, you can choose whether to show or hide the mouse pointer in your screenshots, which is particularly useful for tutorials or presentations where the cursor may distract from the main content. By following these practical tips, you can take cleaner, more organized, and professional-looking screenshots on your Mac.
Differences between MacBook, iMac, and Mac Mini
The keyboard shortcuts for screenshots work the same on all Apple computers, including MacBook Air, MacBook Pro, and iMac. They also work on Mac Mini when connected to a keyboard and mouse, making the process consistent and simple. Whether using a laptop or desktop, capturing your screen is always possible with the same key combinations, making it easy to remember.
This uniformity ensures that users don’t have to learn different methods for different devices. Whether you need to capture the entire screen, a specific window, or a selected portion, the shortcuts remain identical, allowing for seamless workflow across multiple Mac devices. This consistency is especially helpful for professionals and students who frequently switch between MacBooks and desktop setups.
FAQ – Frequently Asked Questions
How to take a screenshot on MacBook Air?
To capture a screenshot on a MacBook Air, press Command (⌘) + Shift + 3 to capture the entire screen, or Command (⌘) + Shift + 4 to select only a portion of the screen. These shortcuts allow you to save the image immediately to the Desktop or a predefined location.
How to take a screenshot on Mac without a keyboard?
Can I capture an entire webpage?
Are screenshots always saved to the Desktop?
By default, macOS saves all screenshots to the Desktop, but you can change this location.
Open the Screenshot app, go to Options > Save To, and select a new folder such as Documents or Downloads.
This helps keep your Desktop organized and ensures that screenshots are saved exactly where you prefer.
Conclusion
Now you know how to take screenshots on a Mac in all possible ways, using shortcuts or apps. You can also use the Screenshot app, the timer, or third-party software for advanced screen capturing options. Whether you’re on a Macintosh, MacBook, iMac, or Mac Mini, you can capture and manage your screen easily. Thanks to keyboard shortcuts, the menu, and the menu bar, taking screenshots becomes a fast and precise process. You can capture or record your screen in a few clicks, save the files, and share them online. Share your screenshots via email, on webpages, or store them in the cloud for easy access anytime. With these methods, taking screenshots or creating a screen recording will always be simple, efficient, and professional.

Leave a Reply