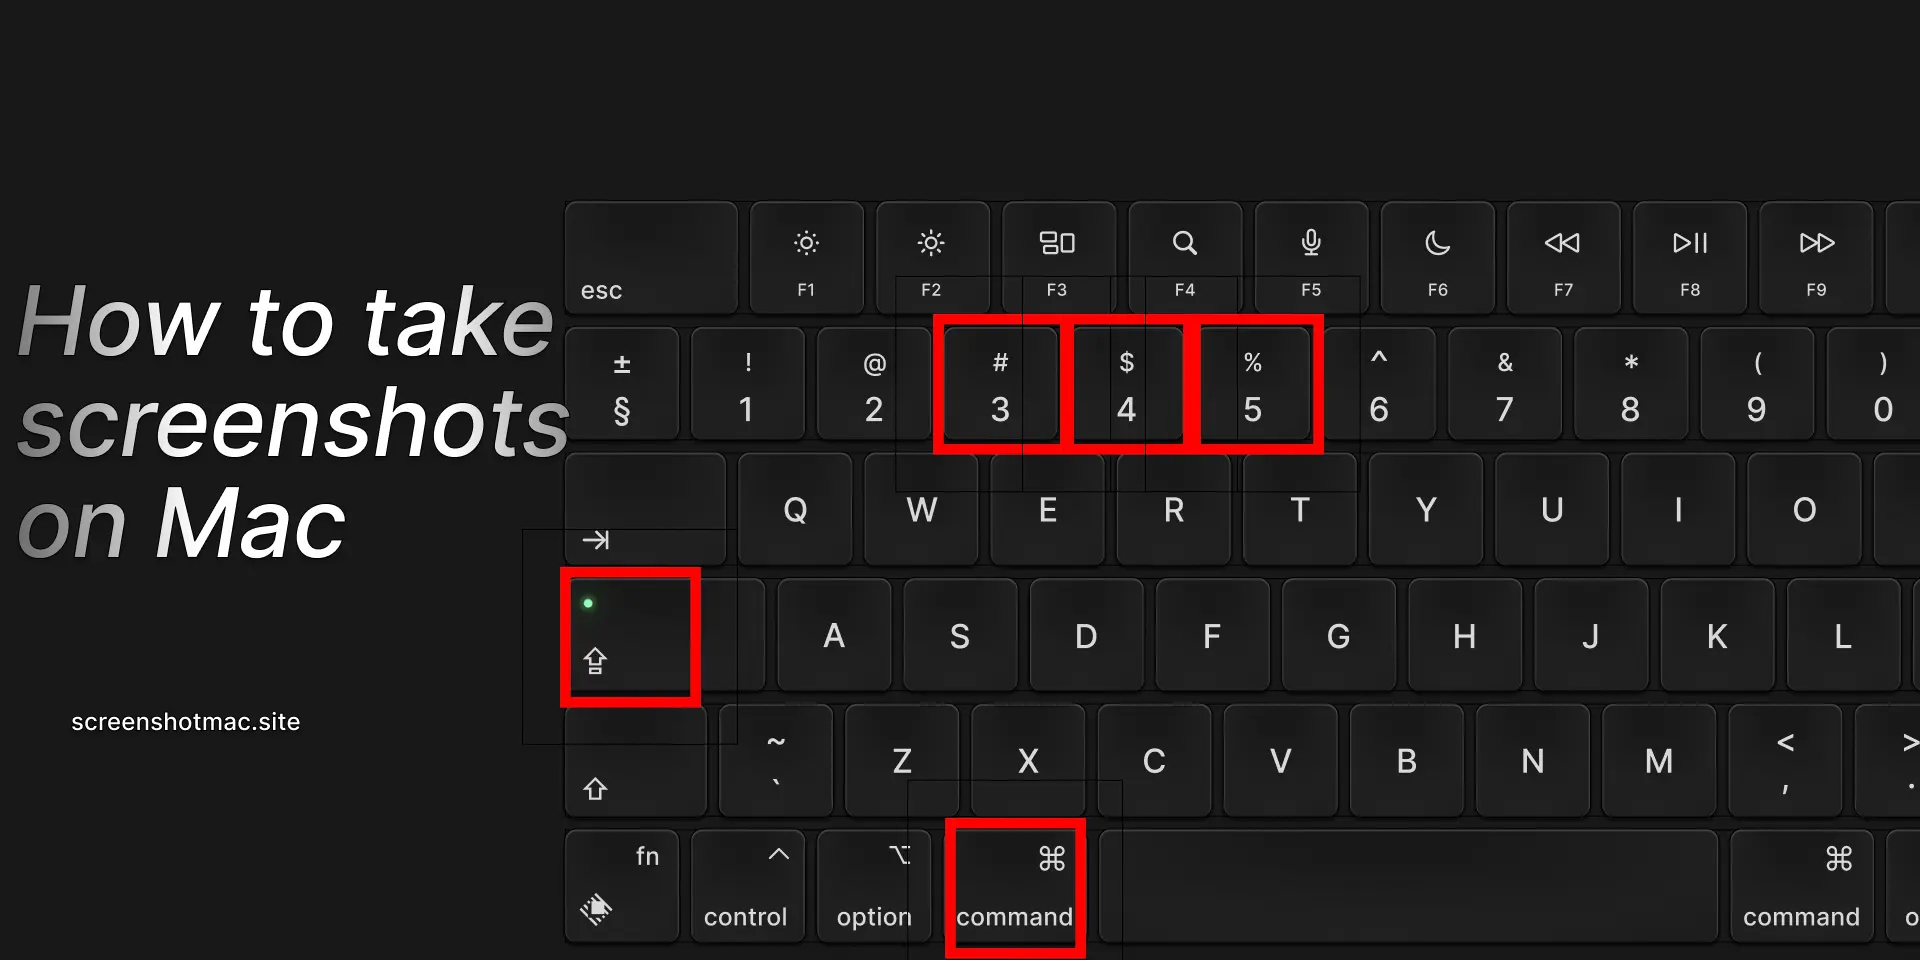
To capture your Mac screen, you can use built-in keyboard shortcuts or the Screenshot app. Press Shift + Command (⌘) + 3 to capture the entire screen, or Shift + Command (⌘) + 4 to select a specific area. For more options, press Shift + Command (⌘) + 5 to open the Screenshot toolbar, which allows capturing windows, recording screen videos, setting timers, and choosing save locations quickly and efficiently.
The Mac screen capture feature is a powerful macOS tool for saving and editing screenshots. You can capture the entire desktop, a specific window, or a selected area using quick shortcuts and built-in functions. With macOS Monterey, Ventura, and Sonoma, the Screenshot app also supports screen video recording. This guide explains key combinations, methods, settings, and alternatives to help you master Mac screen capture efficiently and professionally.
Why Screen Capture on Mac Is Important
Taking a screenshot on a Mac is not just a technical task but a valuable tool in everyday digital life. Screen capture allows you to quickly save visual information from web pages, emails, or important documents. You can use screenshots or recordings to document content you want to keep or share easily. It is essential for creating tutorials and step-by-step guides or communicating with technical support in case of issues. Screen capture is also useful for archiving receipts, order confirmations, or other sensitive data. Additionally, you can record demonstration videos using the built-in feature or tools like QuickTime Player. Using Mac screen capture is therefore crucial for students, professionals, developers, and everyday users, helping to optimize daily work, enhance productivity, and share information effectively.
How to Take a Screenshot on Mac: Main Methods
To capture your Mac’s entire screen, the fastest and most convenient method is to press ⌘ (Command) + Shift + 3 at the same time. This keyboard shortcut immediately takes a screenshot of everything currently displayed on your screen, including open windows, menus, icons, and the desktop background. You will see the screen briefly flash, which confirms that macOS has successfully captured the image. By default, the system saves the screenshot as a PNG file directly on your Desktop, making it easy to locate. Once saved, you can quickly view the image, edit it using built-in tools like Preview, or share it via email, messaging apps, or cloud services. This method provides a fast, reliable, and high-quality way to capture your entire screen for work, study, tutorials, or personal projects.
Method 2: Capture a Selected Portion of the Screen (⌘ + Shift + 4)
When you need to capture only a specific portion of your Mac’s screen, the process is quick and precise. Simply press Command (⌘) + Shift + 4, and your cursor will change into a crosshair, giving you control over the area you want to capture. Click and drag the crosshair to select the exact section of the screen, whether it’s a window, menu, or any portion of your desktop. Once you release the mouse or trackpad button, macOS automatically captures the selected area and saves the screenshot as a PNG file on your Desktop. This method allows you to focus only on the important part of the screen, making it ideal for creating tutorials, sharing specific information, or saving content without capturing unnecessary elements. The Screenshot app ensures that every captured portion is clear, high-quality, and ready for editing, annotating, or sharing immediately.
Method 3: Capture a Specific Window (⌘ + Shift + 4 + Space)

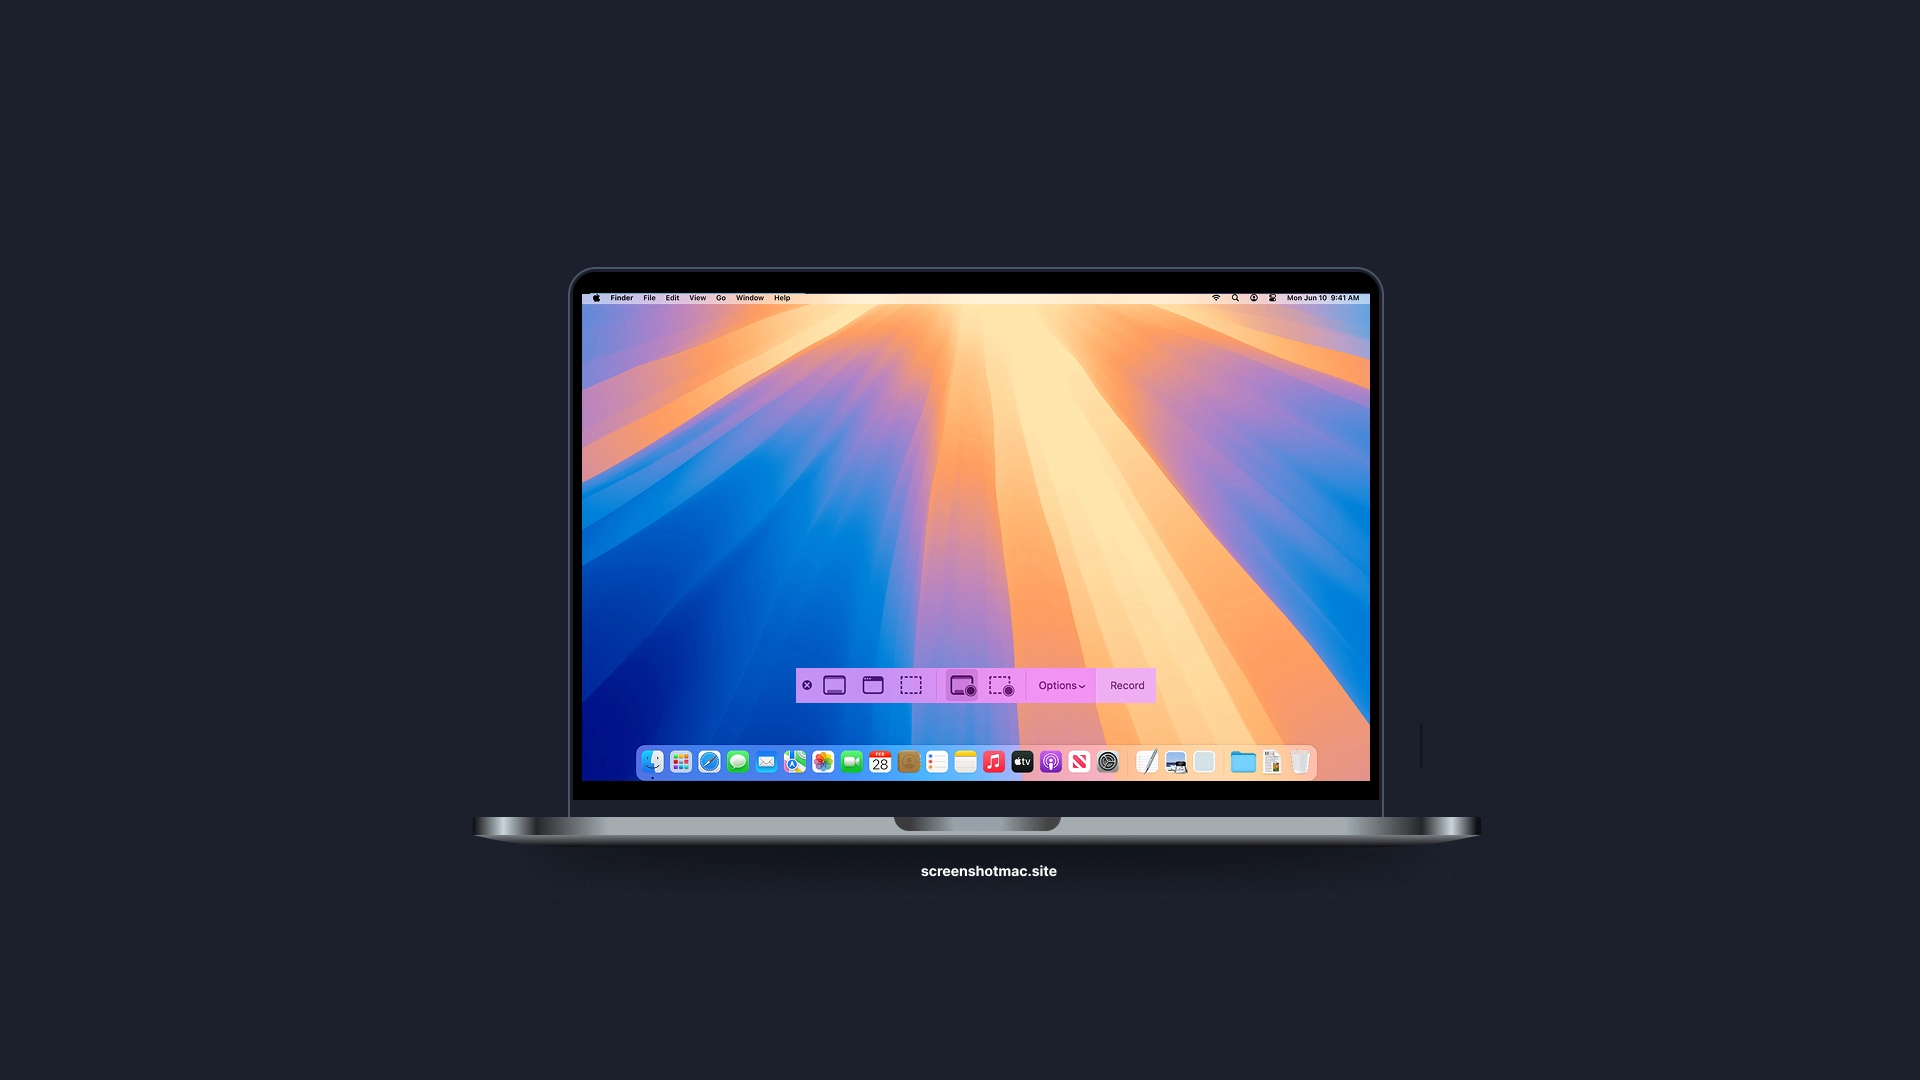
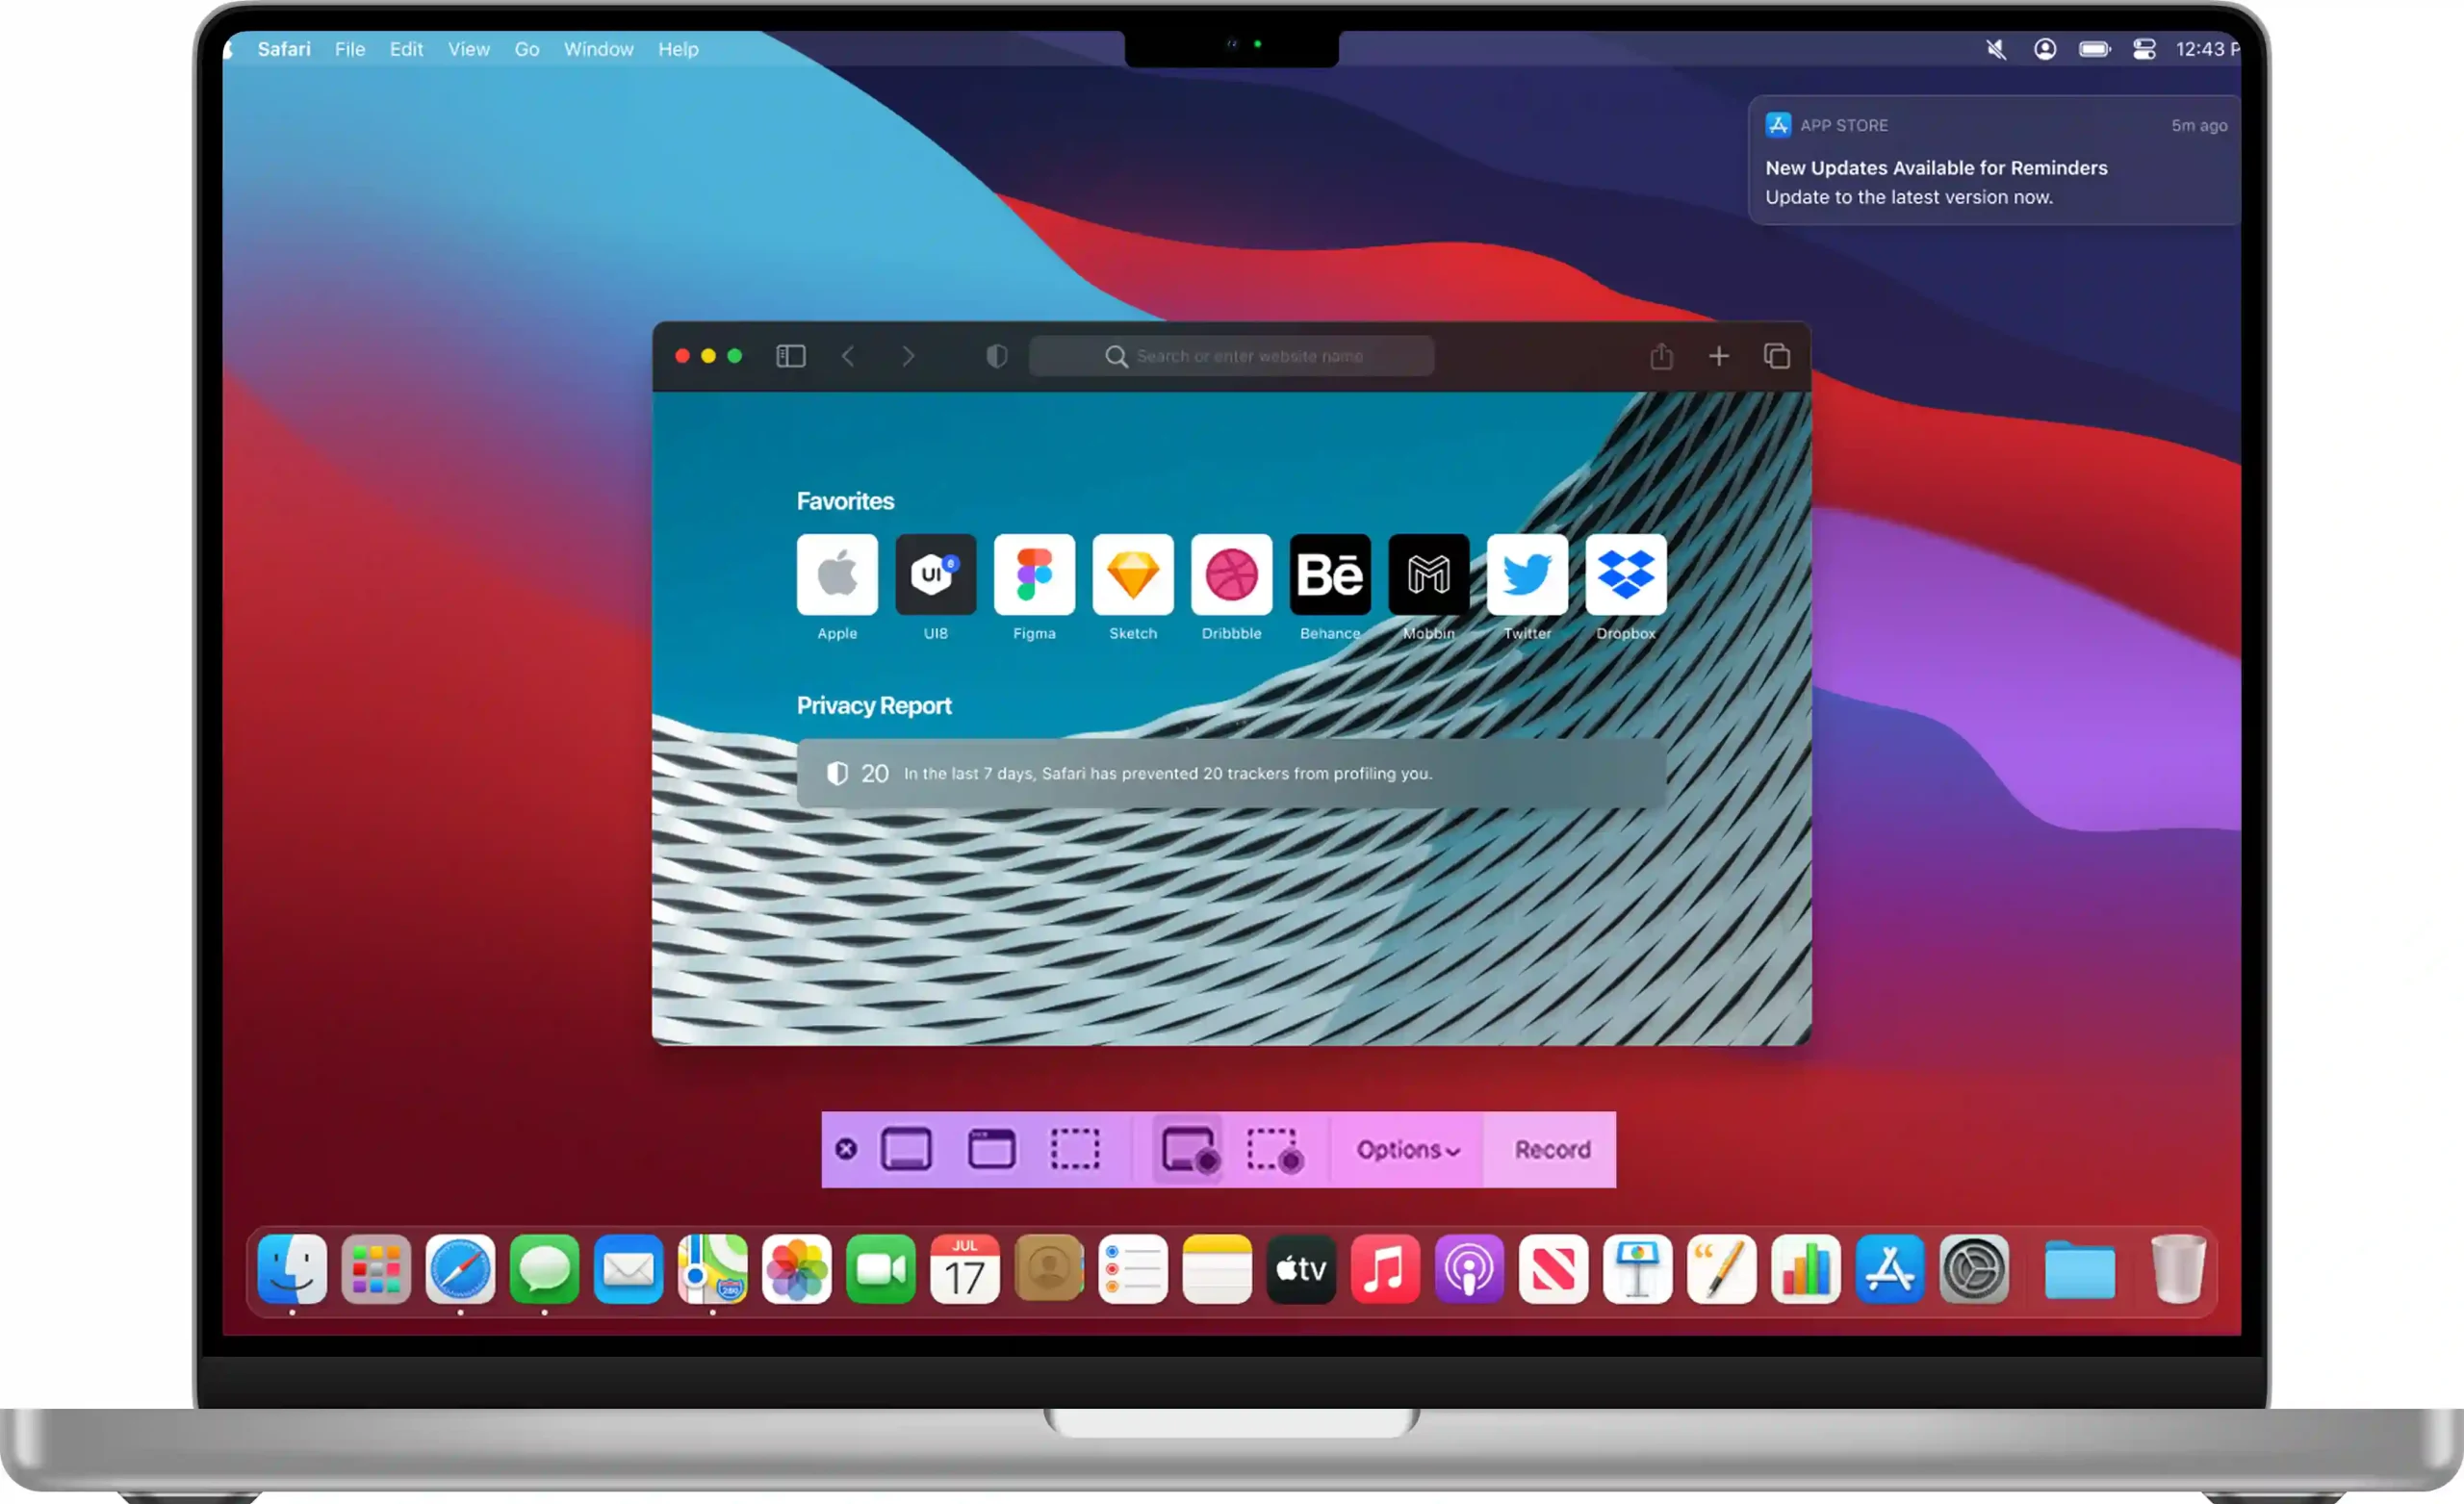
Method 4: Screenshot Utility (⌘ + Shift + 5)
Starting with macOS Mojave, Apple introduced the Screenshot Utility, a toolbar that simplifies capturing and managing screenshots and screen recordings. You can capture the entire screen, a specific window, or a custom area. The utility also allows screen recordings for tutorials or presentations and lets you set a timer for delayed captures. You can choose save locations like Desktop, Documents, or iCloud Drive, or copy directly to the Clipboard for instant pasting. This tool combines speed, precision, and flexibility, making it perfect for casual users and professionals alike.

Method 6: Screenshot with Touch Bar (⌘ + Shift + 6)
Screen Recording on Mac
Method 1: Screenshot Utility
Method 2: QuickTime Player
Another option for capturing your Mac’s screen is QuickTime Player, which offers more control over screen recordings. Open the app, then navigate to File > New Screen Recording.
In the screen recording window, you can adjust settings, select a microphone, and choose recording quality. Once the settings are configured, click the record button to start capturing your screen. QuickTime Player lets you record the entire screen or just a selected portion. This makes it ideal for tutorials, presentations, or documenting processes clearly. When recording is finished, you can preview the video, trim it, and save it in a suitable format. This ensures high-quality recordings are ready for editing, sharing, or professional use.
Where Screenshots Are Located on Mac
By default, macOS saves screenshots to the Desktop for quick and easy access. If you want to change the save location, press ⌘ + Shift + 5 to open the Screenshot toolbar. From there, click Options, where you can set a delay for the screenshot capture and choose a different folder, such as Documents, Downloads, or even a custom location of your choice. This allows you to keep your screenshots organized and accessible.
Screenshot Formats and Editing on Mac
By default, macOS saves screenshots in PNG format, which ensures high-quality and clear images. However, you can easily convert them to JPG or PDF if needed. To do this, open the screenshot in the Preview app, select the area you want to capture or edit, and then use the Export option to save the file in your preferred format. Preview also allows you to add text, highlight important areas, crop, or make other edits to enhance the image before saving or sharing it. This makes it simple to customize screenshots for presentations, documents, tutorials, or any professional or personal use.
Comparison Between macOS Versions (Monterey, Ventura, Sonoma)
All recent macOS versions, from Monterey to Sonoma, include the built-in Screenshot Utility for easy screen capture. They also offer options to record the screen, set a timer, and save screenshots to custom folders. Performance has progressively improved: standard on Monterey, faster on Ventura, and further optimized on Sonoma. This makes capturing and managing screenshots smoother, quicker, and more convenient for every Mac user.
Best Third-Party Apps for Mac Screenshots
In addition to the native functions, there are several applications that expand screenshot capabilities. CleanShot X is a professional solution that also includes dedicated cloud storage and advanced annotation tools for taking screenshots. Snagit is perfect for creating guides and tutorials thanks to its integrated editing features. Lightshot is ideal for those seeking simplicity and speed in capturing screenshots, while Evernote’s Skitch stands out for how easily it allows adding annotations and quickly sharing images.
Practical Tips and Real-Life Scenarios
Another option for capturing your Mac’s screen is QuickTime Player, which offers more control over screen recordings. Open the app, then navigate to File > New Screen Recording. In the screen recording window, you can adjust various settings, including selecting a microphone for audio input. You can also choose the recording quality in the bottom-right corner of the screen before starting. Once settings are configured, click the record button to begin capturing your screen efficiently. QuickTime Player lets you record the entire screen or a selected portion, perfect for tutorials or presentations. After finishing, you can preview the video, trim it, and save it in your preferred format. This ensures high-quality recordings that are ready for sharing, editing, or professional use.
FAQ on Mac Screen Capture
How to Take a Screen Capture on Mac?
Press Command + Shift + 3 to capture the entire screen or Command + Shift + 4 to capture a selected portion of the screen.
How Do You Take a Mac Screen Capture Using the Keyboard?
You can easily use the Screenshot app from the Dock or the menu bar to quickly capture a screenshot of your Mac’s screen.
Which keys should you use to Capture screenshot on Mac?
To take a screenshot on a MacBook, press ⌘ + Shift + 3 to capture the entire screen or ⌘ + Shift + 4 to select a specific area. With ⌘ + Shift + 4 + Space, you can capture a window, while ⌘ + Shift + 5 opens advanced options to record the screen or choose where to save the image.
Mac screen recording: How to record a selected area using a MacBook?
You can use ⌘ + Shift + 5 or QuickTime Player to record your Mac’s screen. The shortcut opens the toolbar to record the entire screen or a selected area, while QuickTime allows you to add audio and save high-quality videos.
Why isn’t screen capture working on Mac?
To ensure your screenshot shortcuts work correctly, open System Preferences, go to Keyboard > Shortcuts, and confirm that all key combinations are enabled.
Conclusion
The Mac screen capture feature is versatile and useful for every need, even on MacBook Air. You can take full screenshots or video recordings with audio, managing everything quickly through keyboard shortcuts and the Screenshot Utility. Using third-party apps enhances functionality for saving and editing screenshots efficiently. By customizing formats and the save folder, and using tools like Preview, you can boost productivity during screen capture. New macOS versions offer continuous improvements, but the main commands remain simple, fast, and easy to use.

Leave a Reply