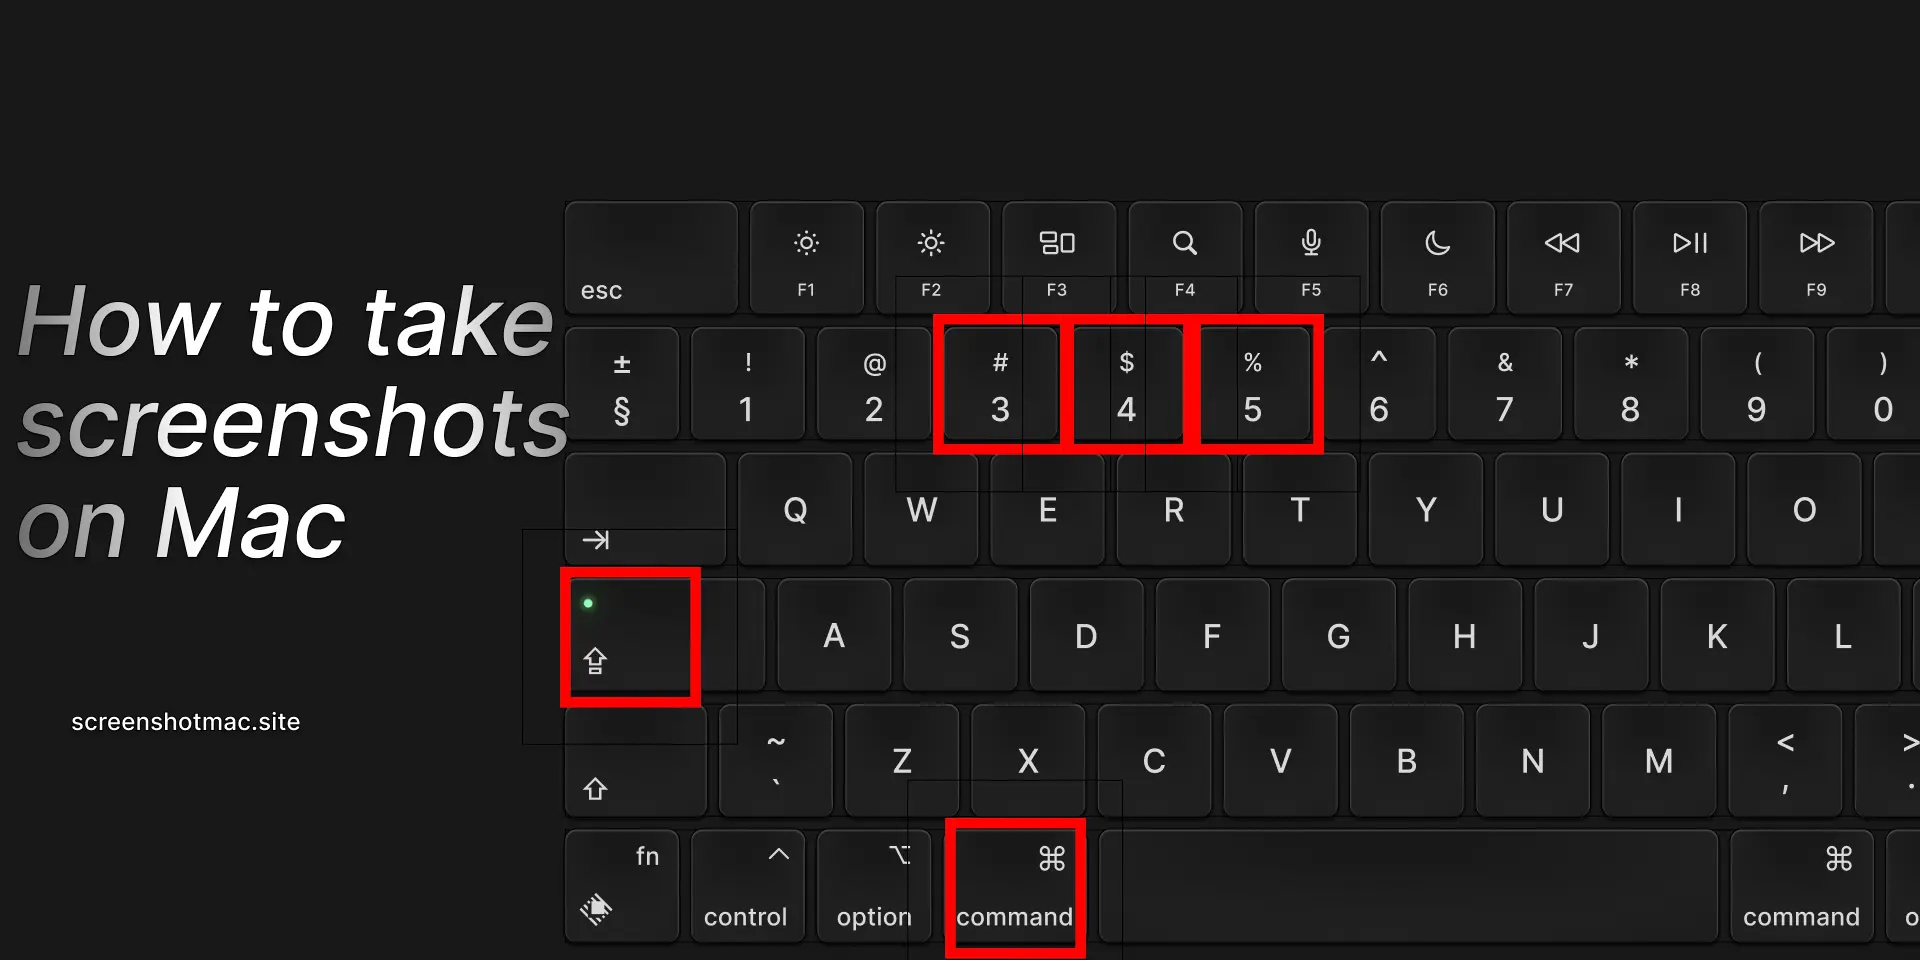
To take a screenshot on macOS, first, press Command + Shift + 3 to capture the entire screen. Alternatively, use Command + Shift + 4 to select a specific area. For more advanced options, such as screen recording, press Command + Shift + 5. Moreover, screenshots are automatically saved to your Desktop, but you can easily adjust the save location or timer settings using the Screenshot Utility for greater flexibility.
If you use a Mac, one of the most requested and essential features is the ability to capture the screen. Whether you need to save a full screenshot, a selected portion, or a single window, knowing how to take screenshot macOS quickly and accurately is fundamental. In this complete guide, you’ll discover all the methods, keyboard shortcuts, built-in tools, and the best alternatives to manage screenshots and screen recordings on macOS, including tips on how to screenshot on a Mac.
Why It’s Important to Know How to Take Screenshots on macOS
Taking a screenshot on Mac is not just about convenience but a vital tool for both work and personal use. With macOS screen capture, you can easily document errors, share presentations, or save images you can’t download. Moreover, it’s perfect for creating step-by-step guides or tutorials on how to screenshot on Mac. In addition, your Mac automatically saves screenshots in high quality and lets you instantly share them via email, chat, or cloud platforms like iCloud.
The built-in Screenshot Utility app in macOS saves time compared to third-party tools and offers advanced features like timed delay, quick editing, and annotations. These functions make capturing and customizing your screenshots effortless. Whether you’re troubleshooting, saving important visuals, or sharing creative content, Mac’s built-in screenshot options make the process seamless and efficient, ensuring you always have a professional-quality capture ready to share or store securely.
Main Methods to Take Screenshot macOS
Full Screen Screenshot of The Entire screen
To capture the entire screen of your Mac, the combination is simple: how to take a screenshot using cleanshot x and other tools.
Command (⌘) + Shift + 3 to take the screenshot on Mac.
This shortcut automatically captures everything visible and saves the screenshot on your desktop if the screenshot is taken correctly. It’s the fastest solution to take a complete Mac snapshot on your screen.
Screenshot of a Selected Portion Of The Screen
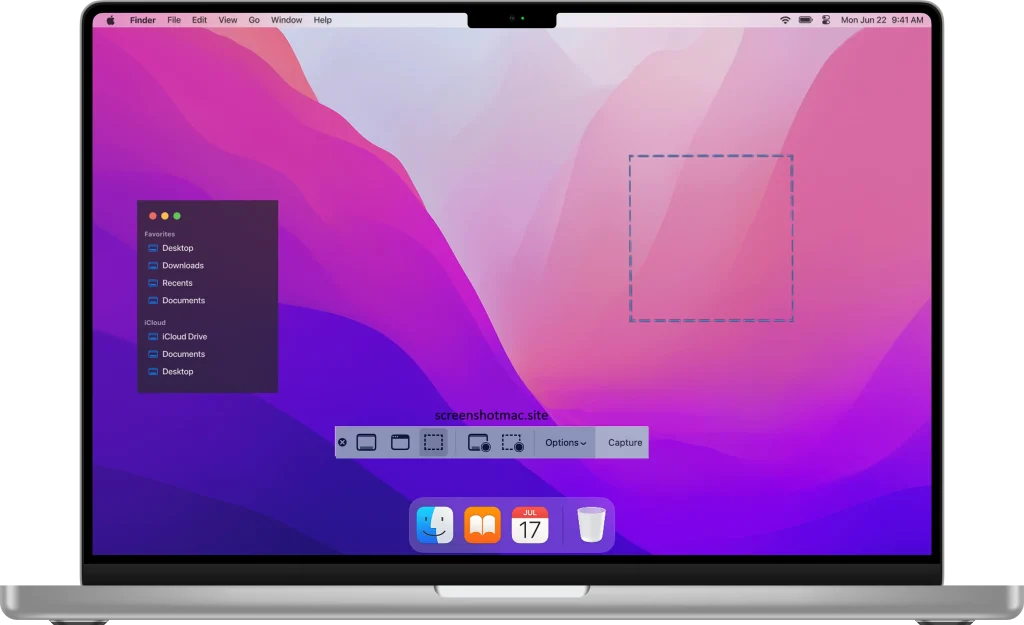
If you only need to capture part of the screen, you can use an app to take a screenshot of the specific area.
Command (⌘) + Shift + 4 takes a screenshot of the selected area on your screen.
After pressing the keys, the cursor immediately becomes a cross, allowing you to select the area for your screenshot. Then, you can drag to choose the desired portion or capture the entire screen. Once you release the mouse or trackpad, macOS automatically saves the selected area as a PNG file directly on the Desktop, ensuring quick and easy access to your screenshot. This function is ideal for capturing a portion of the Mac screen without the need for later editing.
Screenshot of an Active Window
To save a single window, use the screenshot tool for the screenshot.
Press Command (⌘) + Shift + 4.
Then press the spacebar to take the screenshot on a Mac. Press the spacebar to finalize your screenshot selection to edit the screenshot afterward.
Click on the window you want to capture if the screenshot is to be saved.
This shortcut generates a Mac active window screenshot, perfect for organized documents or presentations, allowing you to edit a screenshot if needed.
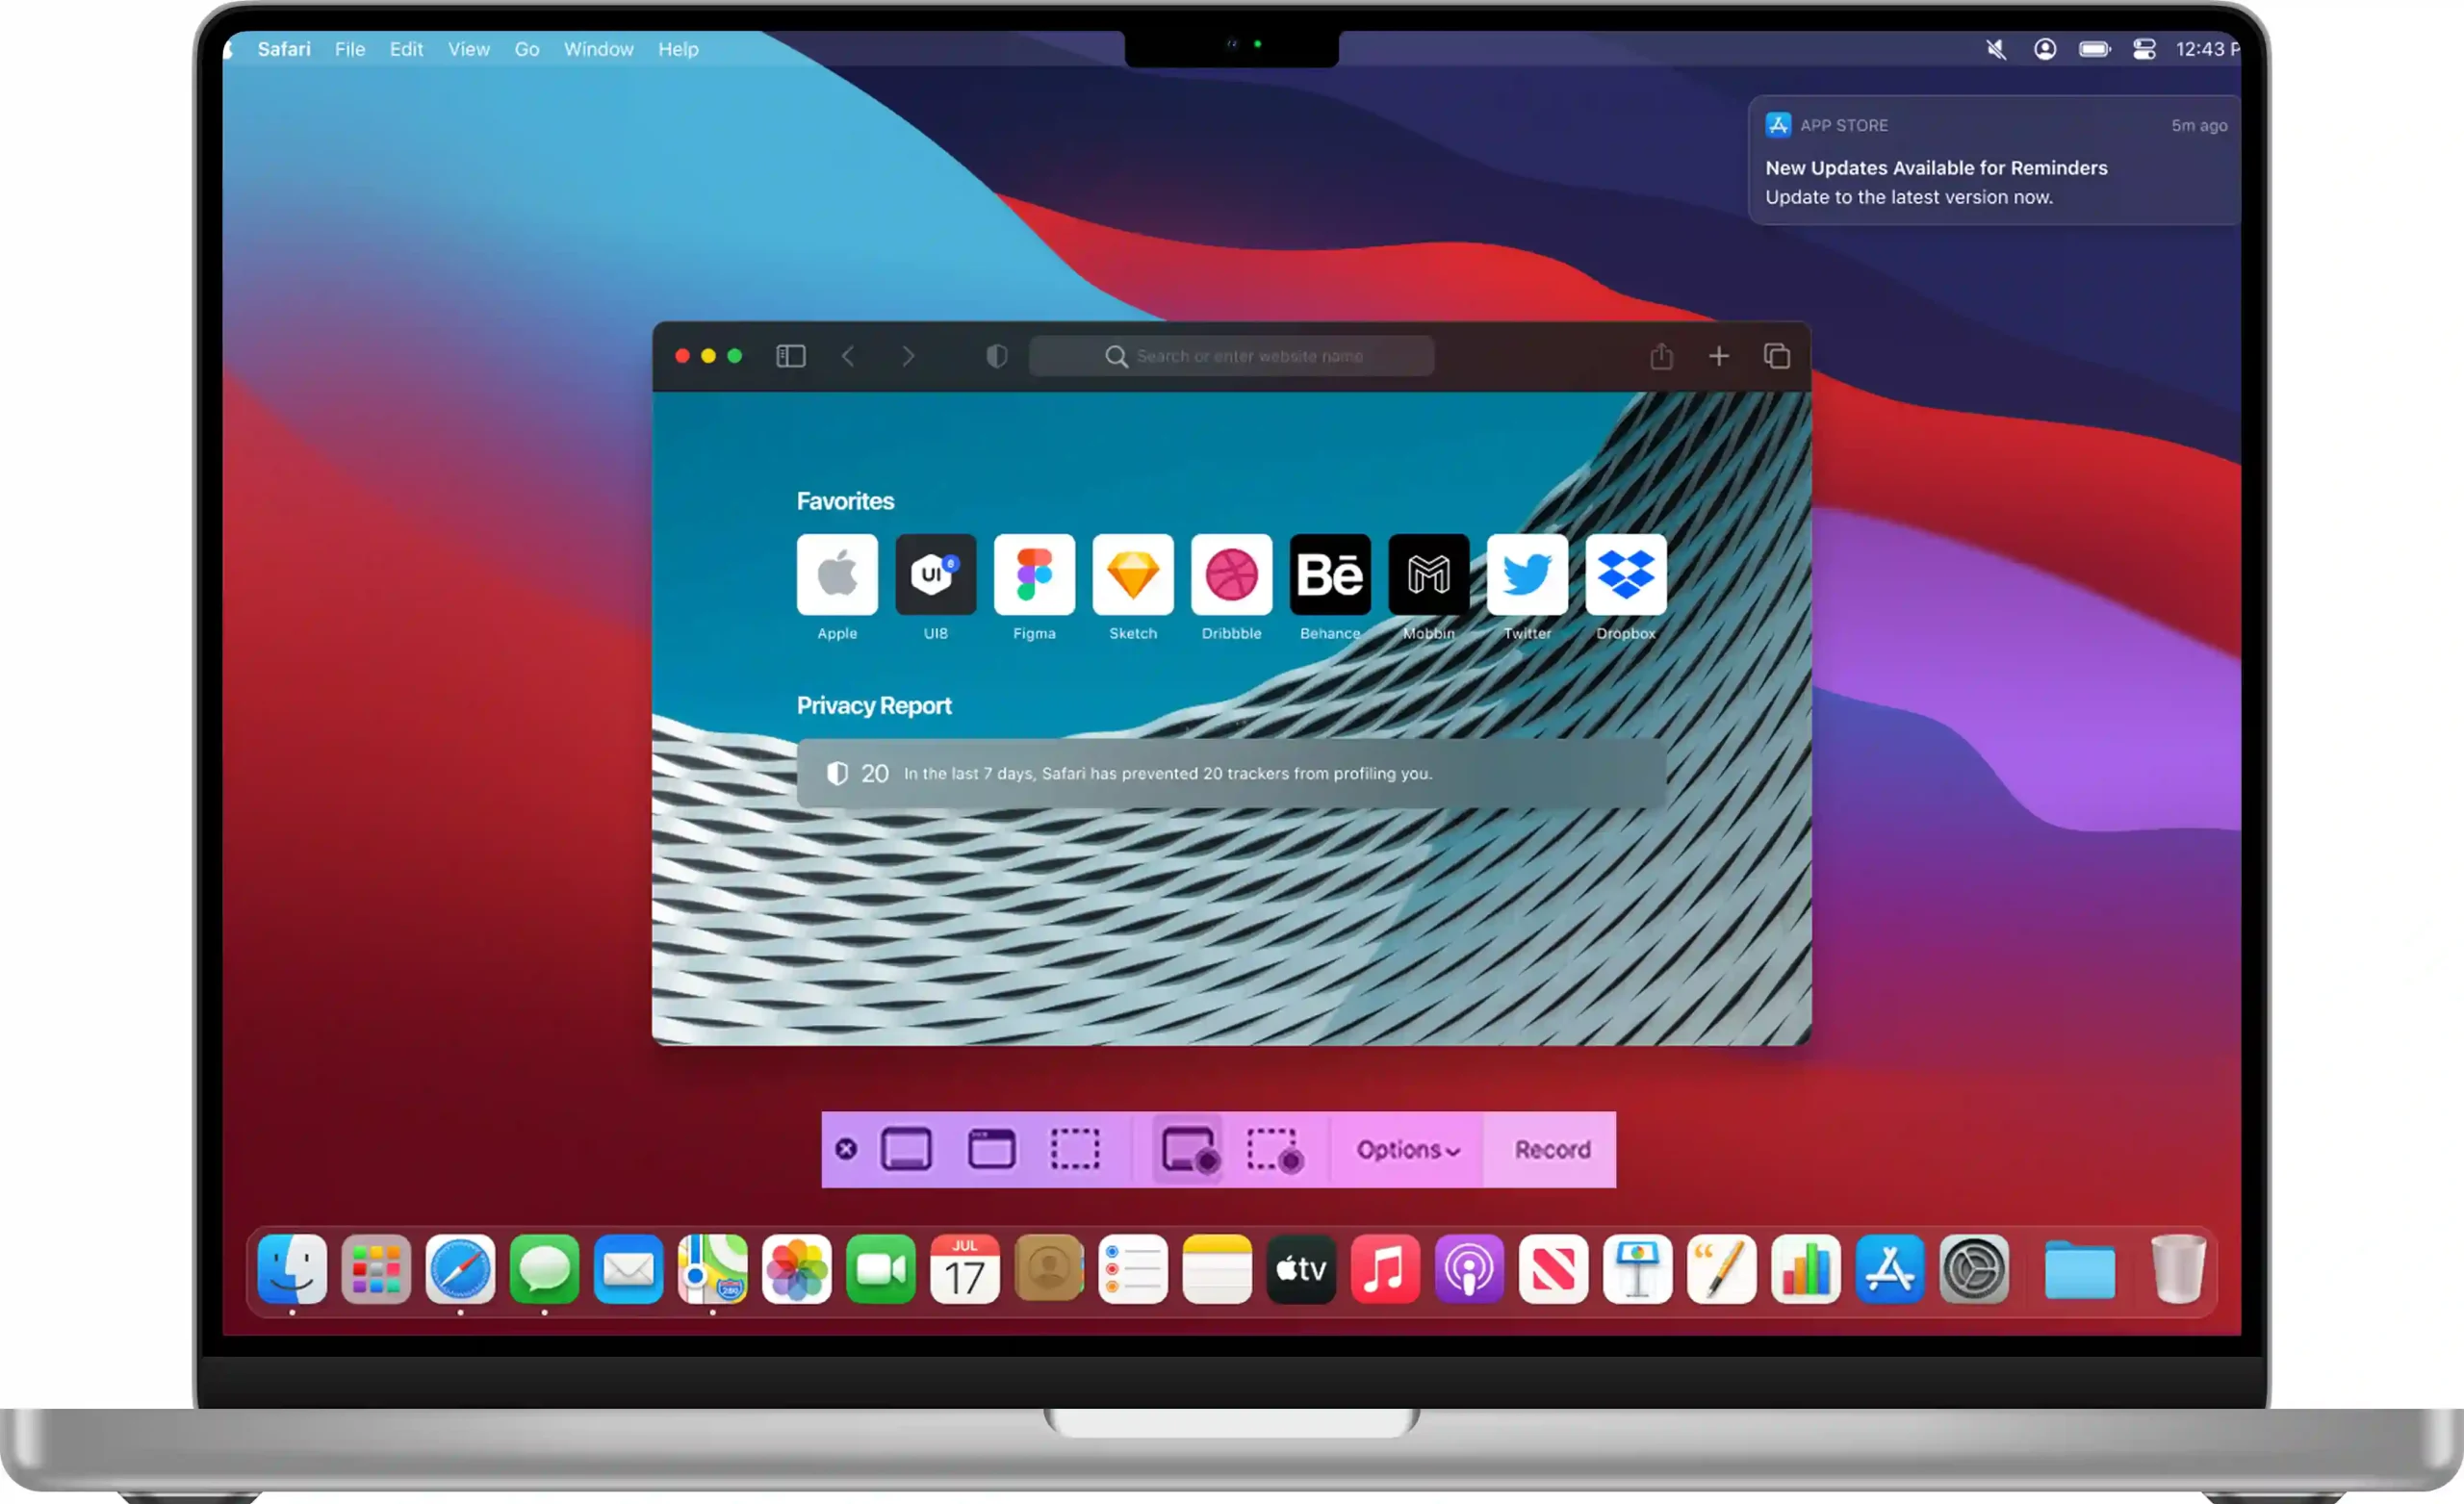
Screenshot with the Control Panel (macOS Mojave and later)
If you use macOS Mojave or newer versions, you can access the built-in app with:
Command (⌘) + Shift + 5 to take a screenshot on Mac allows for more options.
This combination opens a small panel with several options: capture entire screen, capture selected window, capture custom portion, video recording of the screen, and advanced settings (such as automatic saving or timer). It’s the most complete solution for those who want to manage screenshots and recordings.
Screenshot with Touch Bar on MacBook Pro
If you own a MacBook Pro with Touch Bar, you can also capture what appears on this interactive bar by taking a screenshot of your touch bar.
Press Command (⌘) + Shift + 6 to capture a screenshot and save it to your clipboard.
Your Mac saves the image like any other screenshot, which is helpful for developers or users who want to document specific Touch Bar interactions.
Where Screenshots Are Stored on macOS
By default, screenshots are saved on the Desktop in PNG format, allowing you to easily save your screenshot. However, with macOS you can change the saving location directly from the panel opened with Command + Shift + 5 to manage your screenshot files. You can choose folders such as Documents, Photos, or even upload them directly to iCloud Drive for quick access from other Apple devices.
Settings and Customization of Screen Capture on Mac(To Take a Screenshot on macOS)
The Screenshot Utility app to take a screenshot allows you to customize:
- The default save folder for your screenshot file on your desktop.
- The file format (PNG, JPG, PDF).
- The activation of a delayed timer for capture allows you to prepare the screen to wait for the screenshot to capture effectively.
- Whether or not to include the mouse pointer appears in the corner of the screenshot.
This way you can adapt macOS screen capture to your specific needs and let your Mac automatically save the screenshot in the designated location, making it easier for you to find later.
Difference Between Screenshot and Screen Recording
Many users confuse screenshots with screen recording on Mac, especially when trying to capture your screen.
- A screenshot captures a static image of the screen, which can be especially helpful for documenting a portion of the screenshot.
- Recording creates a continuous video of screen activities.
To record the screen, you can simply use Command + Shift + 5, and then choose the “Record Screen” option to document what appears on your display. Additionally, the QuickTime Player app provides video recording with more advanced settings, allowing you to capture your Mac screen more precisely and flexibly.
Alternative Apps for Screenshots on MacOS
Even though macOS integrates powerful tools, there are third-party applications that offer additional features:
- CleanShot X: ideal for professionals, with advanced editing and cloud saving.
- Snagit is a popular screenshot tool among professionals: widely used in business for creating guides and tutorials. Especially when using the screenshot tool to document the corner of your screen.
- LightShot: simple, free, and fast, especially when using the screenshot app.
These solutions can be useful for those who want more than the native functions.
Comparison Table: Shortcuts To Take Screenshot on macOS
| Type of Screenshot or part of the screen or full screen. | Shortcut | Description of the methods to capture the screenshot to save to your device includes various options on how to edit a screenshot after it’s taken. |
| Full screen takes a screenshot of the entire display. | Command + Shift + 3 | Captures the entire screen |
| A selected portion of the screen can be captured using the screenshot app to edit a screenshot on the left side of your screen. | Command + Shift + 4 | Lets you choose an area of the screen for the screenshot. |
| Active window | Command + Shift + 4 + Spacebar | Saves a single window for your screenshot. |
| Options panel | Command + Shift + 5 | Full control and recording to select the area of the screen to capture. |
| Touch Bar | Command + Shift + 6 | Screenshot of the Touch Bar |
Practical Tips for Using Screenshots Effectively
Use keyboard shortcuts to take the screenshot for Mac screenshots to save time.
>If you need to share quickly, drag the screenshot directly from the Desktop into chat or email.
>Use Preview to edit, crop, or add annotations without installing extra software.
>Organize screenshots by creating dedicated folders in Finder to avoid mixing them with other files and make it easier to open the screenshot later.
FAQ on Take Screenshot on macOS
How do I quickly take a screenshot on macOS using simple steps on the screenshot keyboard?
Press Command + Shift + 3 to take a screenshot of the full screen or Command + Shift + 4 for a selected portion on your Mac.
What is the macOS screenshot shortcut to capture your screen?
The main shortcuts are Command + Shift + 3, Command + Shift + 4, and Command + Shift + 5.
Where are screenshots saved on Mac?
By default, screenshots are saved on the Desktop, but you can change the location from Screenshot Utility settings.
Can I take screenshots on Mac with a Windows keyboard if the screenshot is saved automatically?
Yes, I have a screenshot. If you use a Windows keyboard connected to your Mac, the keys corresponding to Command and Option can replace the standard combinations for the screenshot to capture on the screen.
How do I record your Mac screen instead of taking screenshots on a Mac?
Press Command + Shift + 5 and select the “Record Screen” option to record your Mac screen and have a screenshot of your recording. Alternatively, use QuickTime Player.
Is there a way to take delayed screenshots on Mac to give you time to set up your screen?
Yes, with Screenshot Utility you can set a timer of 5 or 10 seconds before capturing the screenshot in the preferred location to wait for the screenshot to save on your computer.
Conclusion
Knowing how to take a screenshot on macOS is an essential skill for any Mac user. First, it helps effectively manage your screen captures and organize your workflow efficiently. Moreover, thanks to built-in shortcuts, the Screenshot Utility app, and recording options, capturing is simple and fast. Next, use the methods that best suit your needs and organize files properly in Finder. Additionally, if necessary, rely on trusted third-party apps for extra screenshot or editing features. Ultimately, with this knowledge, you’ll always have quick and effective tools to document, share, and communicate easily on your Mac.

Leave a Reply